
How do you do parcels around a cul-de-sac?
This is a quite common question. I used to get bombarded during those notoriously straightforward straight road demos with cries of "BUT THAT ISN'T REAL. WE DO A LOT OF CUL DE SACS" followed by "I hate Civil 3D" and "Civil 3D Sucks".
Well... I do cul de sacs, elbows and other weirdness with Civil 3D parcels all the time. This is just a way that I have found works.
There are many other Autocad and Civil 3D tools that can be combined to make a good cul de sac.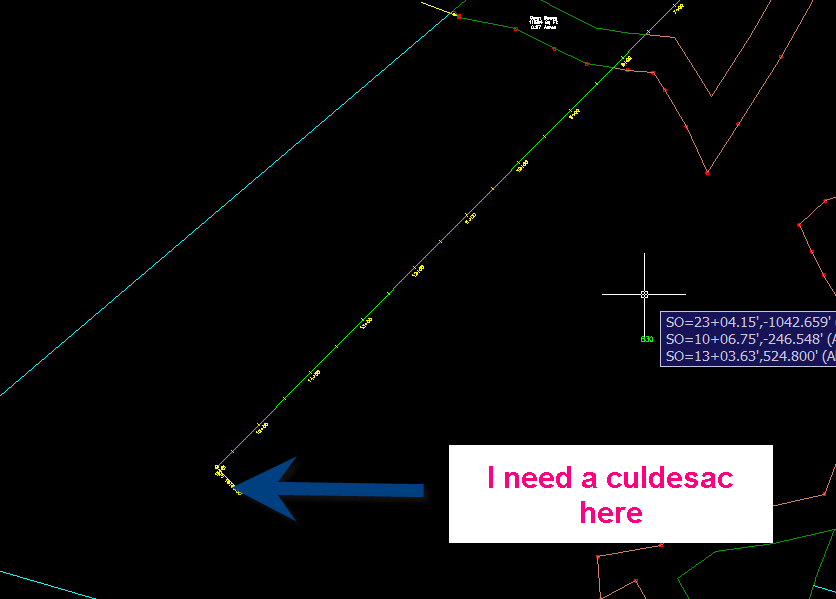
This works in both Civil 3D 2006 and 2007. Don't forget The Parcel Rules .
THE PARCEL TOOLKIT
There are a bunch of AutoCAD commands I like handy when doing a site plan. So I made a Tool Palette for them. Making a custom tool palette is super easy. I am a customization MORON and I can handle this.
If you aren't familiar with toolpalettes, they are SO EASY it hurts.
There is a pdf paper in the Files Area of the Cadapult_Civil Yahoo Group that you can download that will take you throught making a custom toolpalette. Or check out HELP or the New Features Workshop under HELP.
You have to be a Cadapult_Civil Member to get that paper, but everyone is welcome to join. You just need a yahoo login. http://groups.yahoo.com/group/cadapult_civil
REMEMBER- ANY CAPTURE CAN BE ENLARGED BY CLICKING ON IT!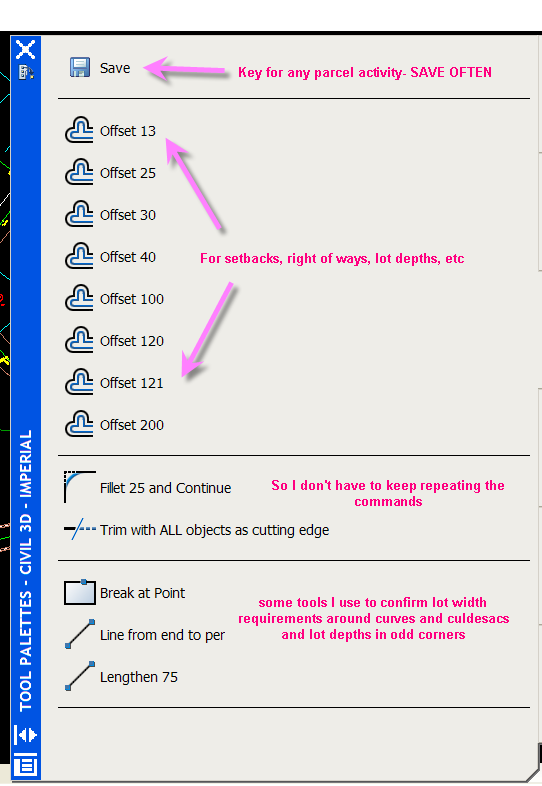
Yes, there is a ROW parcel tool under Parcels Menu. But I don't like it. It works OK for simple stuff, but it is too hard to edit the result. I like to make my ROW and Back of Lot target parcels from polylines.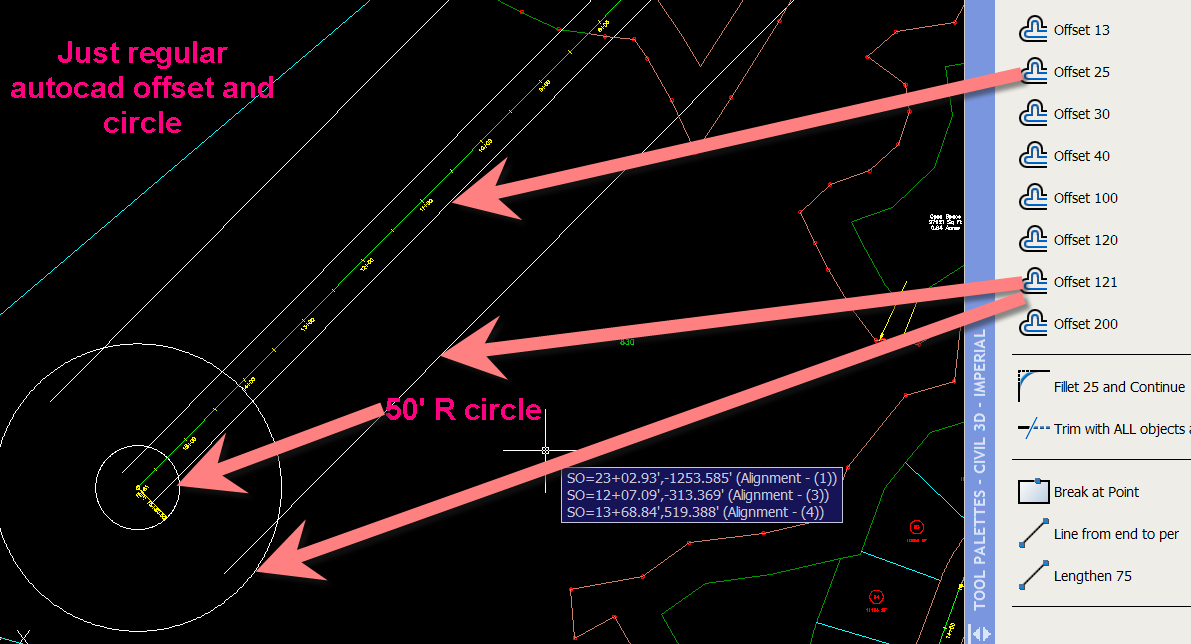
Use regular offset to offset your aligment. The resulting offset lines are polylines.
I make a circle for my culdesac.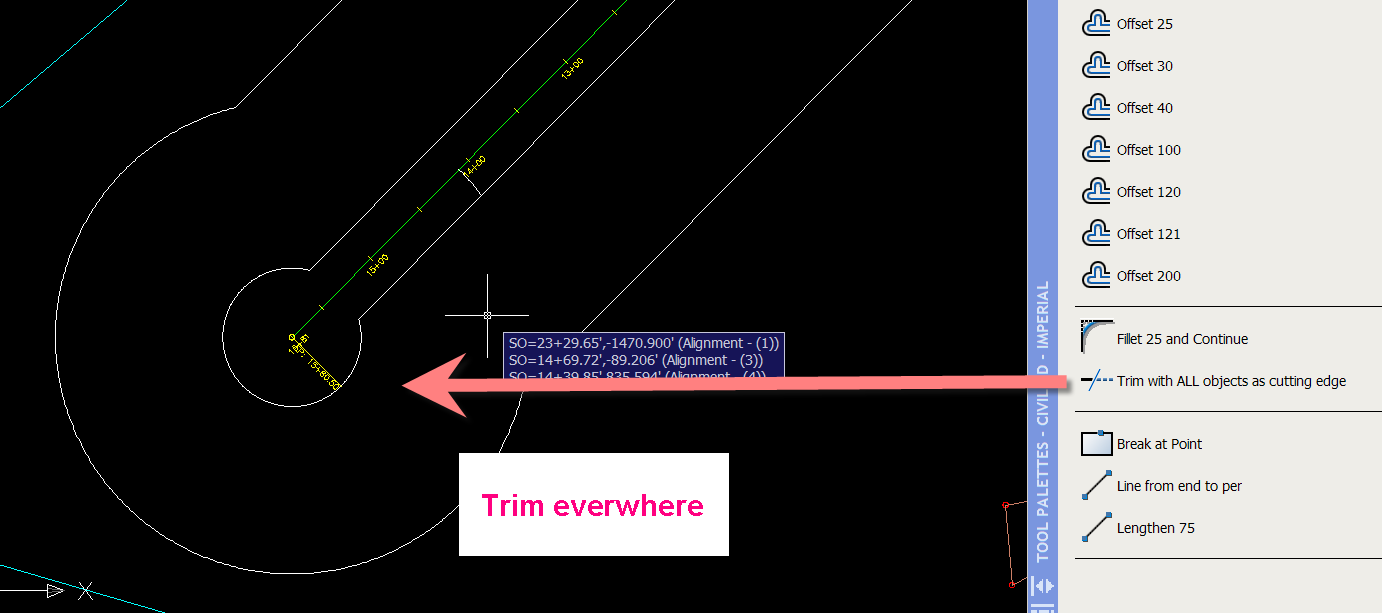
Fillet and trim as necessary around Cul De Sac and intersections. You have to explode the polylines in order to fillet to circle.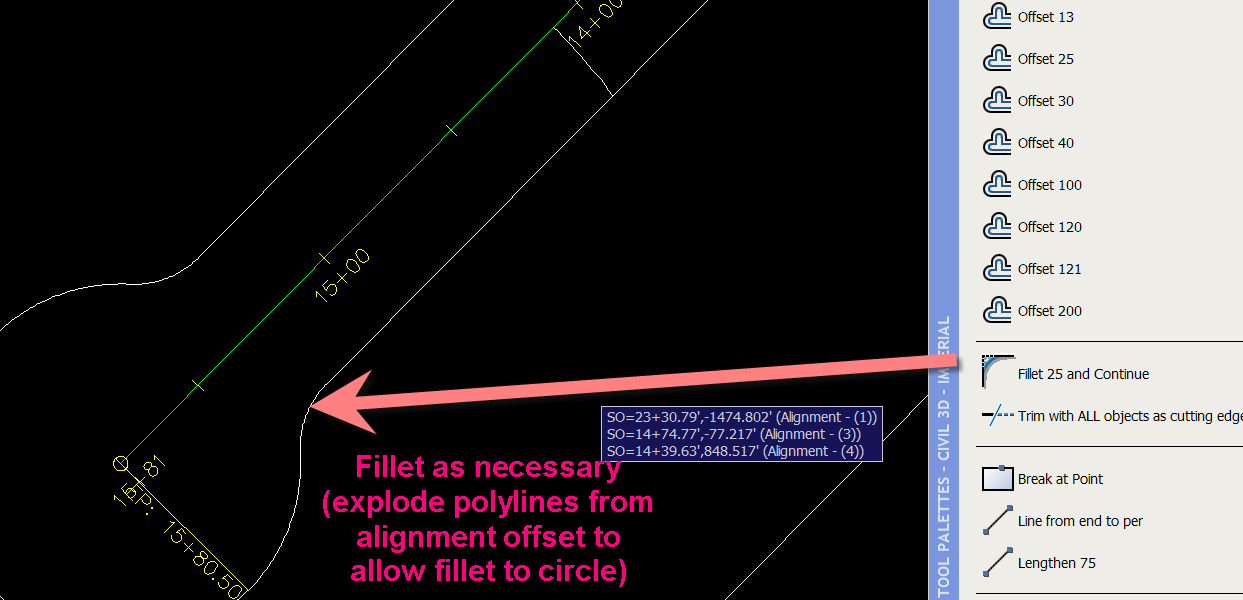
I like to join all the lines to prevent leaky buckets. It also gives me a chance to erase the whole ROW at once later if I want.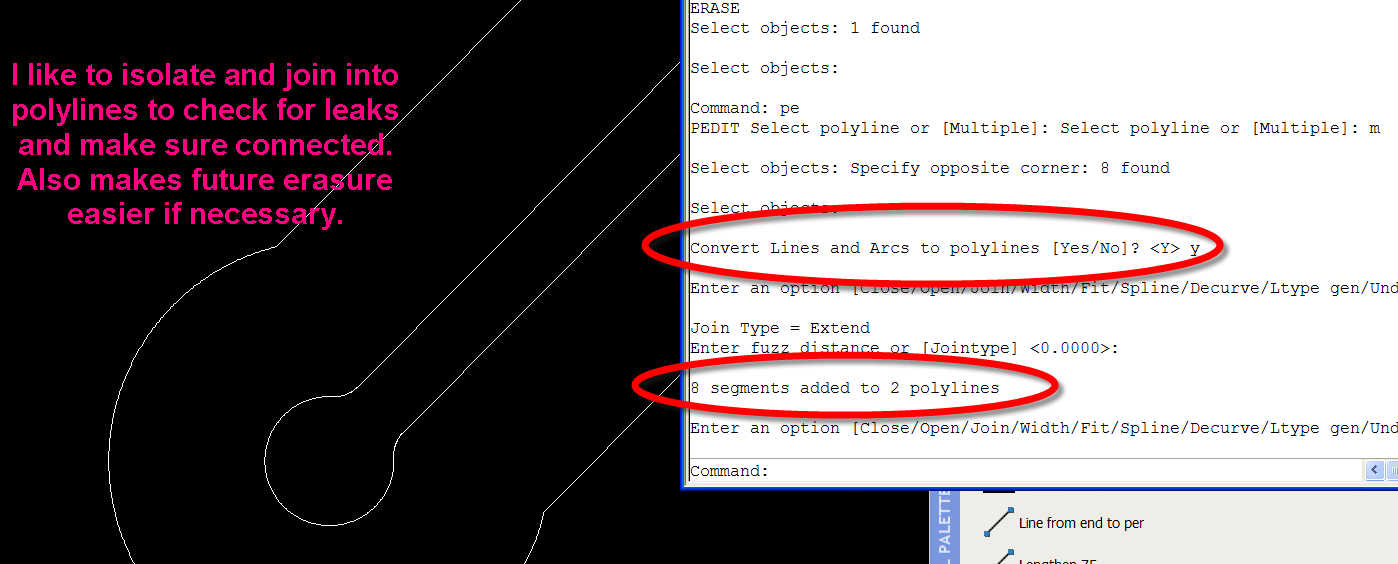
Once they are closed and tight, define them as a parcel.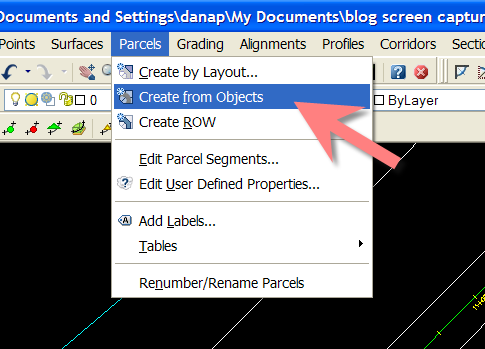
Here is my starting point. I leave the back of lot target rounded for now.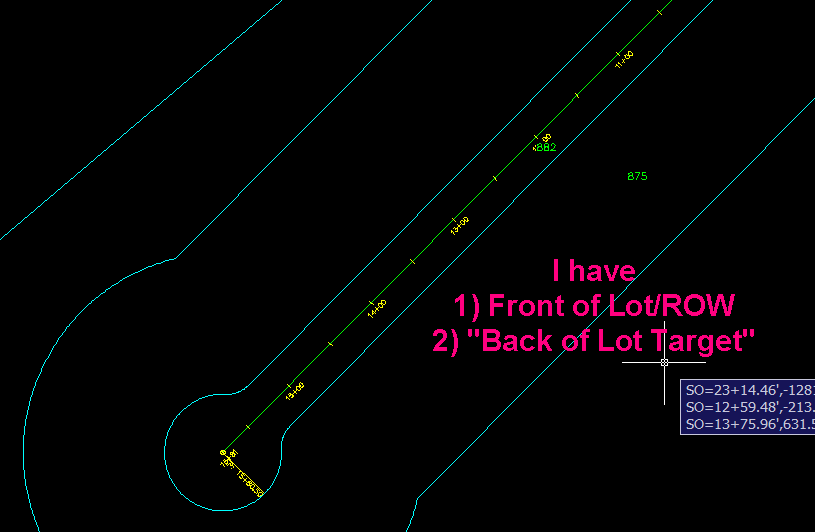
I like to make perfectly sized lots along the first stretch.


Then, since my lot width is measured from the building restriction line (40 ft in this case) I offset my ROW with a little guideline. You can change the frontage in the parcel layout tools to a lower frontage number if you know what works.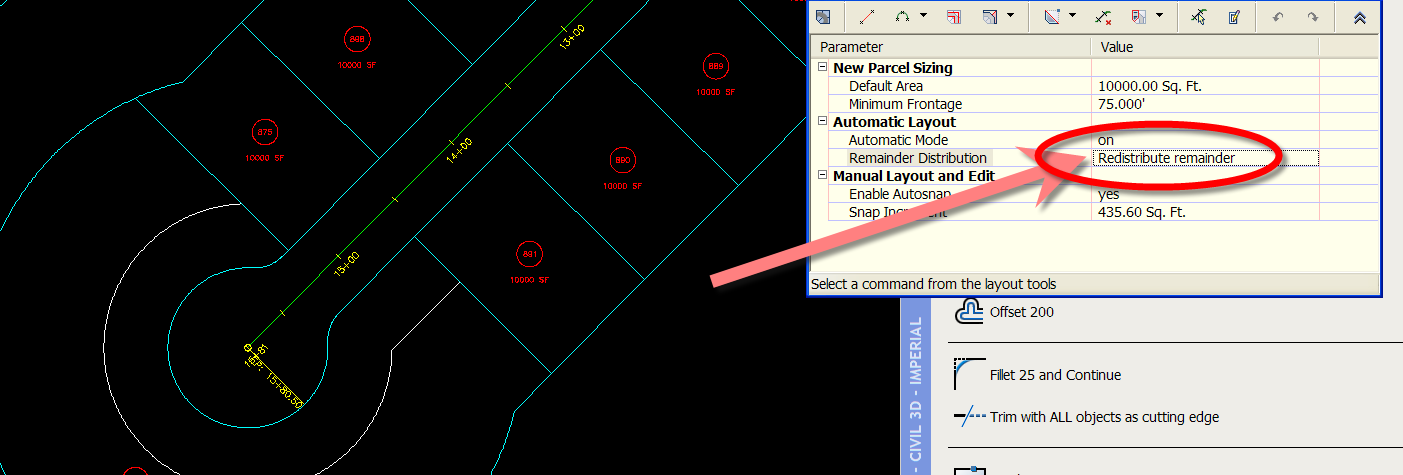
There are a few ways to confirm and get your frontage. This is just the way I am doing it now. Other ideas include making a BRL parcel and a BRL site, then laying your parcels out there with min. frontage and using that result as a guide.
I like to break my guideline at point, then use the lengthen command (which also shortens BTW) to see where 75' is.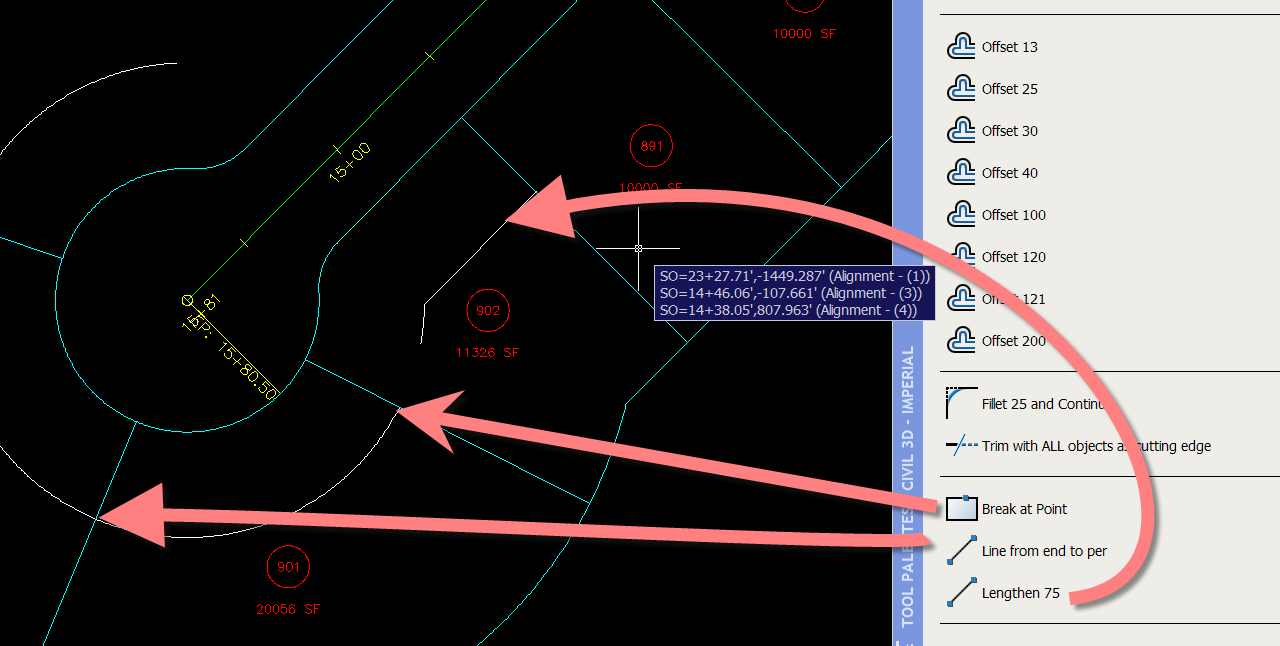
Then I grip edit my attached parcel segment.
If the width is good, but the lot is too small, I can add another segment.
And erase the perpendicular to ROW segment. Using the parcel edit erase button, I can erase one segment at a time.
To square up the rears when I am done, I draw a new segment (or acad line then create from objects) then erase the arc using the parcel edit tools.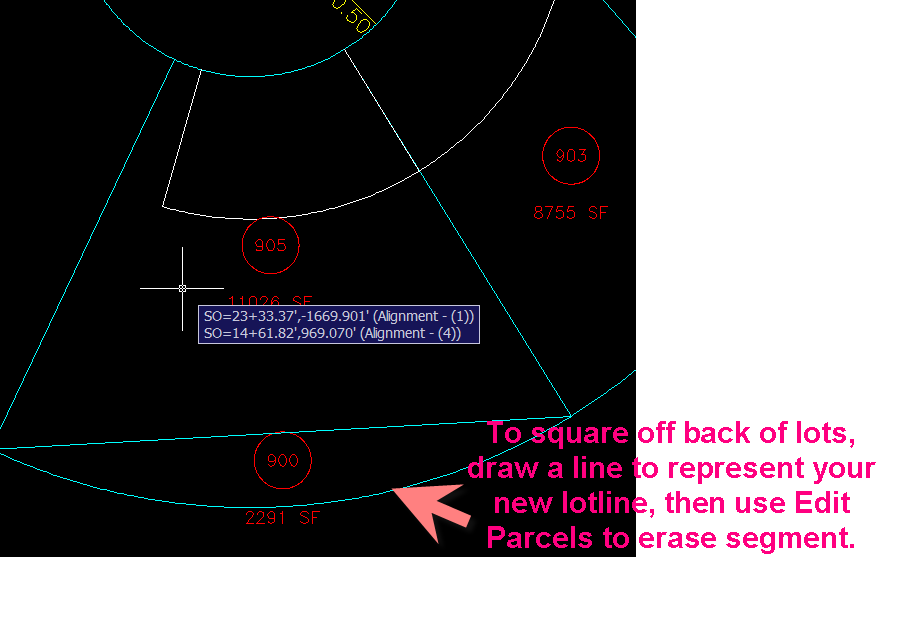
After a few iterations and adjustments, I wind up with this:
Friday, July 07, 2006
Handle the Bag: Cul-de-Sacs and Parcels
Posted by Dana at 5:34:00 PM
Subscribe to:
Post Comments (Atom)


8 Comments:
What an awesome post Dana, easy to follow. People often try several different methods to accomplish this task, I believe this to be one of the best! Thanks a bunch!
hey dana,
I followed you step and I could get my parcel to work. I created the two polyines and i can't created Side Angle Lots. I don't want to be critcal but I felt there was a lot missing steps. On a postive note the images are really clear and easy to read. It just seems parcel are a lot work when all you have to do is offset line to get the same result.
Did you define those polylines as parcels?
i reread the post and did a mental checklist and i don't think i left anything out that would have stopped you from being able to use slide angle create.
The key is to once you have polylines to define them as parcels.
my posts are not intended to be a complete start to finish- but a generation of ideas to get you started.
culdesac parceling may or may not be faster than the way you do it now.
but the straight portions are unbelievably faster using parcel tools compared to tradtional.
the big payback comes in edits and labeling.
Hey Dana,
I started over again and it worked if i closed my plines but didn't work if they where open.
Should they be closed plines? because in your image it shows to seperate plines.
it is very hard to help when i am not over your shoulder because there might be other parcel topology problems in the mix here.
But in GENERAL i like to make joined plines that aren't necessarily closed, but once they are defined as parcels they will be closed on the parcel.
you also need a boundary parcel in here. there is more to it that could be causing your problems.
you can send me the dwg if you want and i can see if there is something easy to fix. my email address is in my profile.
thank you for the link Dana, I had thought of doing pretty much that what you explained. I was missing a step, which you filled in for me. I was hoping there was some "magic tool" in the editor box of the ROW . .lol thanks again
chris
After you trim the circle to the offset lines it becomes an arc, the arc can be converted to a polyline and filleted to the r.o.w. lines. This avoids exploding the ofset r.o.w lines to perform the fillet and then joining them back together later.
Good post. It's nice to confirm that the method I stumbled into is the right way.
Post a Comment